Complete instructions to delete Skun

Skun is detected as the harmful and malicious trojan that result to cause lots of issues and problems within your system once it get infected with it. As it easily infiltrate within the system via surfing on the Internet, download of freeware program, p2p sharing of your files, use of the removable drives, visit of the suspicious and harmful websites and such more that leads to spreads its harmful codes to entire parts of your computer. As the system get infected it stop you to further more operate on to your computer and start the execution of its malicious files. On the other hand open the system backdoor gate to drop infected and corrupted files within the system. It also modify the settings of the installed web browsers like Firefox, Google Chrome and Internet Explorer and even replace the home page of the web browser. It is therefore advised you to remove Skun soon from your infected computer.
Skun also responsible for the displays of numerous pop-up ads, advertisements, offers, deals, coupons and such more on the web browser that makes you annoyed to any more surf on the web. Even it also reduces the surfing speed of the Internet that takes long time to get your desired search response. Though collects all the personal details of the users like email contacts, login details, password, bank account, credit card and so on to send these information to the remote server. Thus for the system safety and security you should remove Skun trojan virus as soon as possible from the system.
Expert Recommendation:
Skun is a fatal threat and remove it as soon as possible. To get rid of it completely, download Skun Scanner

Automatic Scanner Features :
Automatic Skun scanner is very safe and powerful anti-spyware application which protects your system from Skun spyware and other with the help of its real time protection. Some important features of this application:
- Quick, complete and custom scanning - It scans your complete hard disk, removable drives, memory, registry, individuals folders etc .
- Detect and Remove - spyware , malware, adware, trojans, worms, keyloggers, hijackers and some other types of threat.
- Real-time Blocking - it provides you the facilities of real-time blocking of threat which prevents your computer from harmful software installation or re- installation.
- Automatic Threat update - fast and continuous threat updates are downloaded and installed automatically which protects your PC from different types of spyware.
- Easy and simple user interface - very interactive and user friendly interface where you can operate the tool without any help.
- Efficient support service : if you are facing the problem when you use the application then you can contact the customer support team where you can get the solution of your problem easily in few minutes.
- Operating system compatibility : it is compatible with the all windows versions like windows 7, win xp, vista, win 97, 98,2000, 2003, windows server 2008.
Steps To Reboot Your Computer In Safe Mode
For Windows XP | Vista | Win7
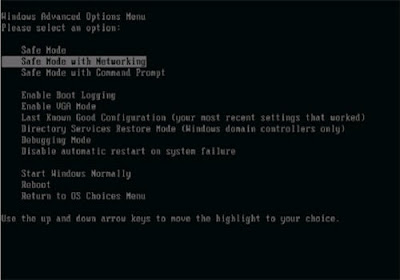
1. At, first restart your computer.
2. Press F8 button continuously once the PC start booting and then select the option to enter Safe Mode with Networking.
For Windows 8
1. Open your PC and press on to start button and then go to control panel from the menu option.
2. Then opt for System and Security, to select Administrative Tools and then goto System configuration.
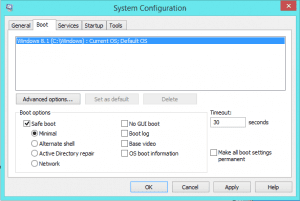
3. After that click on the Safe Boot Option and click on OK button. It will open a pop-up Window, and then Restart the PC.
For Windows 10
1. Start your PC and then goto Menu option.
2. Press SHIFT key on the keyboard, to select the Restart option. This will reboot Win 10.
3. Now select the Troubleshoot icon, which is followed by advanced option in the Startup settings. After that click on Restart. It will give you the option to reboot, now select Enter Safe Mode with Networking.
Remove Skun From Task Manager On Windows
Steps To End The Running Process Related To Skun Using Task Manager
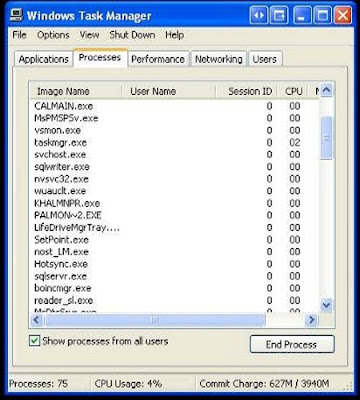
1. Open Task Manager by presssing Ctrl+Shift+Esc all together.
2. Then, Click on processes to Find Skun.
3. Now Click and select End process to terminate Skun.
Remove Skun Created Files From Registry
1. Open Registry by Typing Regedit in the Windows Search and then press on Enter.
2. Open the registry entries, and then press CTRL+F together and type Skun to find the entries.
3. Once the entries is find out, delete all Skun named entries. In case, if you are unable to find it out, then you need to look up for it on the directories manually.
HKEY_CURRENT_USER—-Software—–Random Directory
HKEY_CURRENT_USER—-Software—Microsoft—-Windows—CurrentVersion—Run– Random
HKEY_CURRENT_USER—-Software—Microsoft—Internet Explorer—-Main—- Random
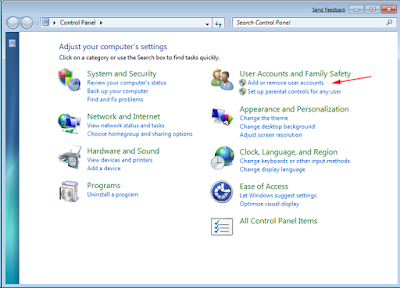
Remove Skun From Control Panel On Windows
For Windows XP | Vista | Win7
1. First, click and select on Start Menu.
2. Then, goto Control Panel and select the program list.
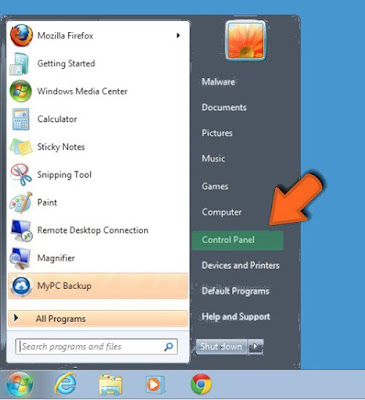
3. Now Click on uninstall program button.
4. Select Suspicious program related to Skun and right click on it.
5. At last select Uninstall option.


For Windows 8
1. At first, click and select "Menu Option".
2. Now goto setting option and select it.
3. Then click on Control Panel.
4. Select on Uninstall a program Option and right click on program that are associated to Skun and at last Uninstall it.

For Windows 10
1. Click and Select on to Start Menu.
2. Then, Click On All Apps.
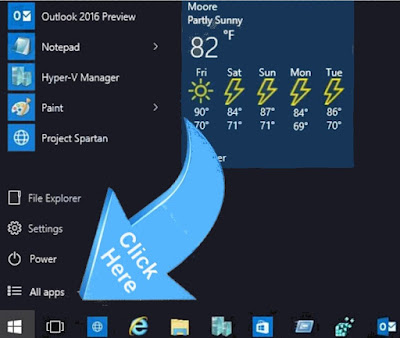
3. Select Skun and other Suspicious program from the program list.
4. Now, click onto select Skun and finally Uninstall it from Windows 10.


No comments:
Post a Comment